ClickHelp User Manual
Use Salesforce as SSO Provider
|
|
Important |
| When using SSO, you need to create user accounts in ClickHelp for each SSO user that authenticates with a 3rd-party service. This is required so ClickHelp can apply specific permissions to the authenticated user, and those permissions are configured in a ClickHelp user profile. You can use ClickHelp REST API to bulk-create users or to create a new ClickHelp user every time a new application user is getting created on your end. | |
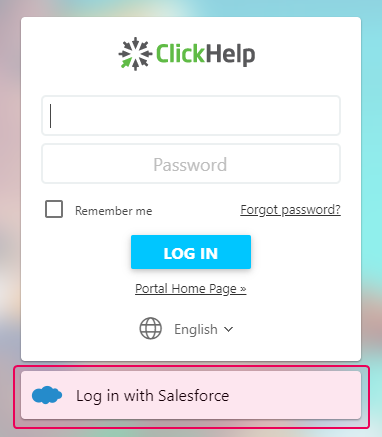
You can log in to your ClickHelp documentation portal using your Salesforce account. Let's see how you can configure this:
-
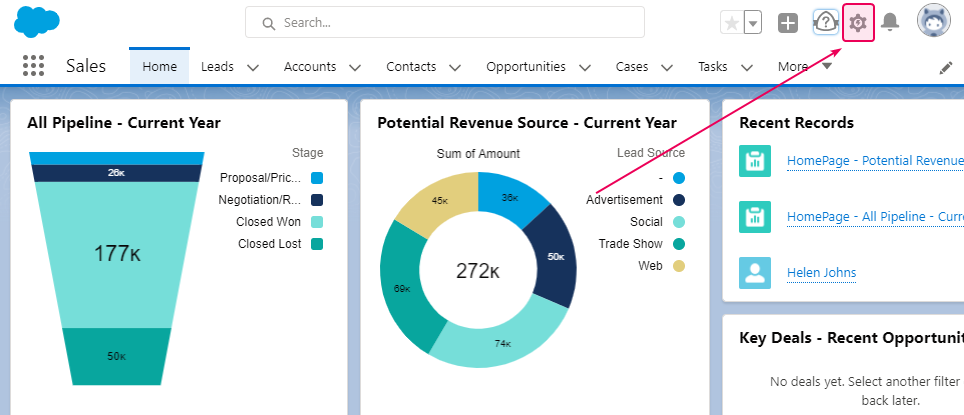
Log in to your Salesforce org using an administrator account and go to Setup.
-
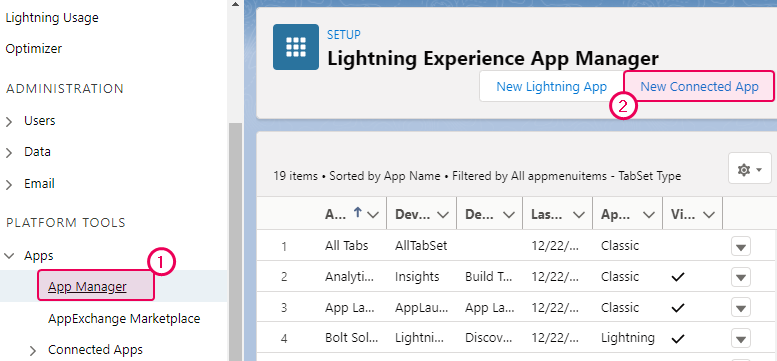
Open the App Manager page and click New Connected App.
-
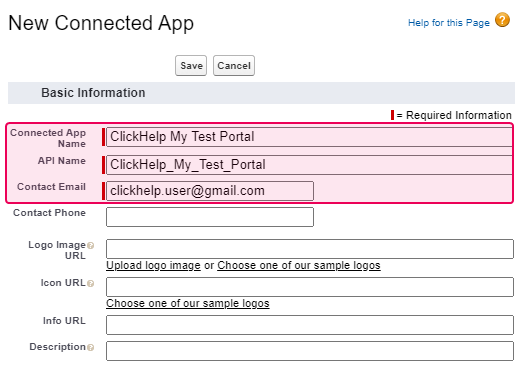
Specify the name for the new connected application.
-
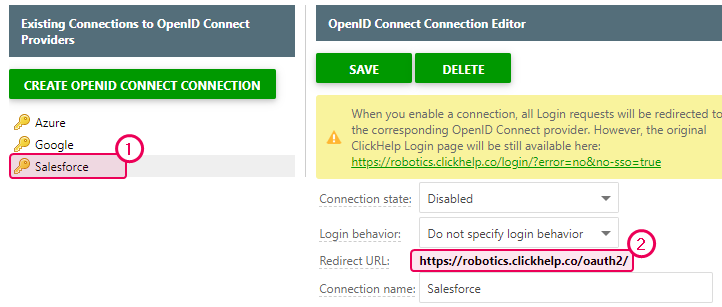
Now you need to get some information from your ClickHelp portal. Open it, go to Single Sign-on settings and get the Redirect URL field value for the Salesforce connection item.
-
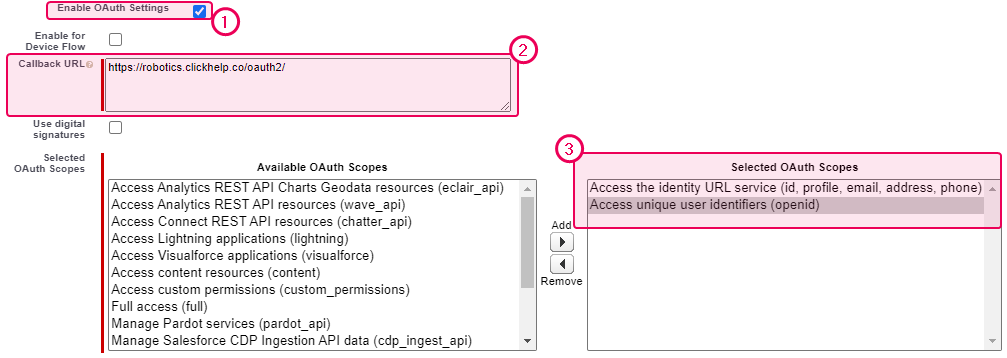
Go back to Salesforce, check the Enable OAuth Settings box, put the redirect URL taken from ClickHelp to the Callback URL field, and move the following scopes to the Selected OAuth Scopes list:
- Access the identity URL service (id, profile, email, address, phone)
- Access unique user identifiers (openid)
-
Save changes and find the Consumer Key and Consumer Secret values on the app summary page.
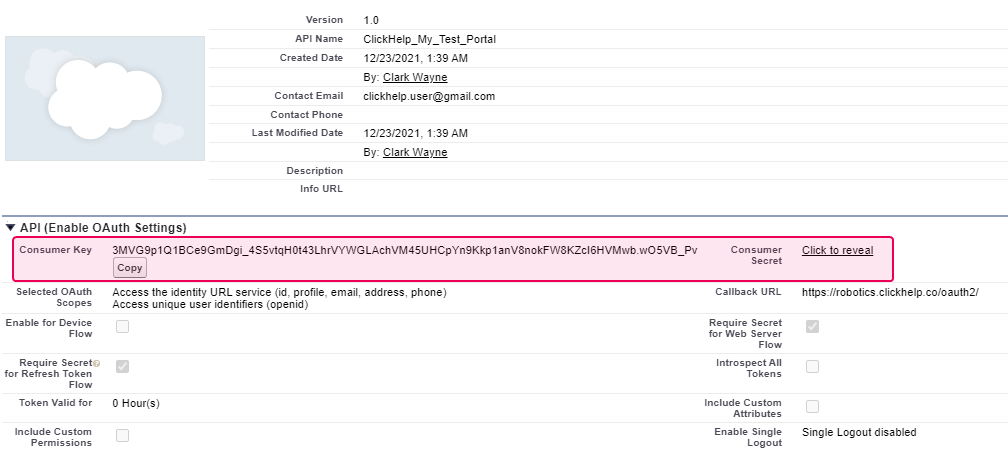

Note Salesforce may need up to 10 minutes to enable the connected application. As a result, you may not be able to log in to your portal within this period. -
Put these values to the Client ID and Client Secret fields of the Salesforce connection settings in your ClickHelp portal. Enable the connection and save changes.
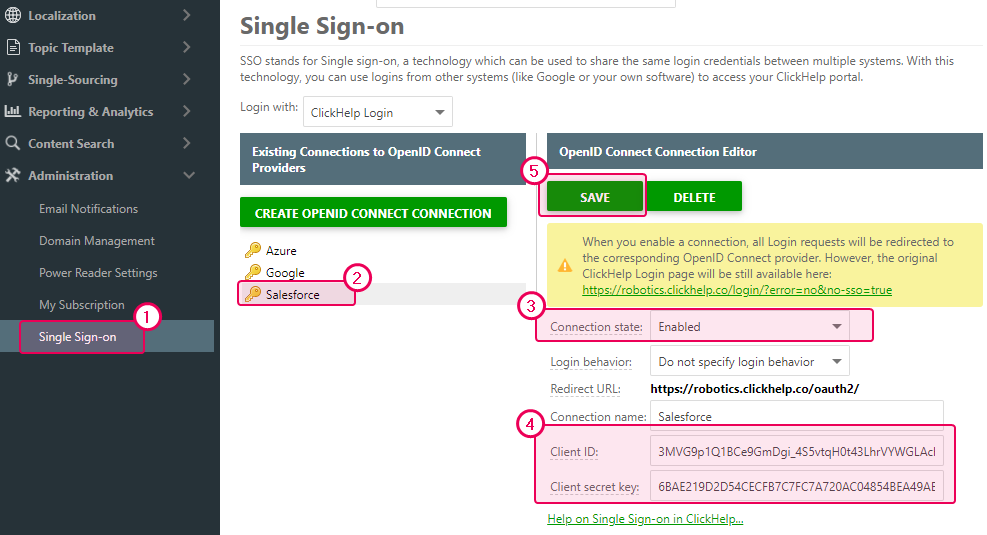
Now, it should be possible to log in to your ClickHelp portal using the Salesforce OpenID Connect provider. However, you may need to change up some security settings beforehand.
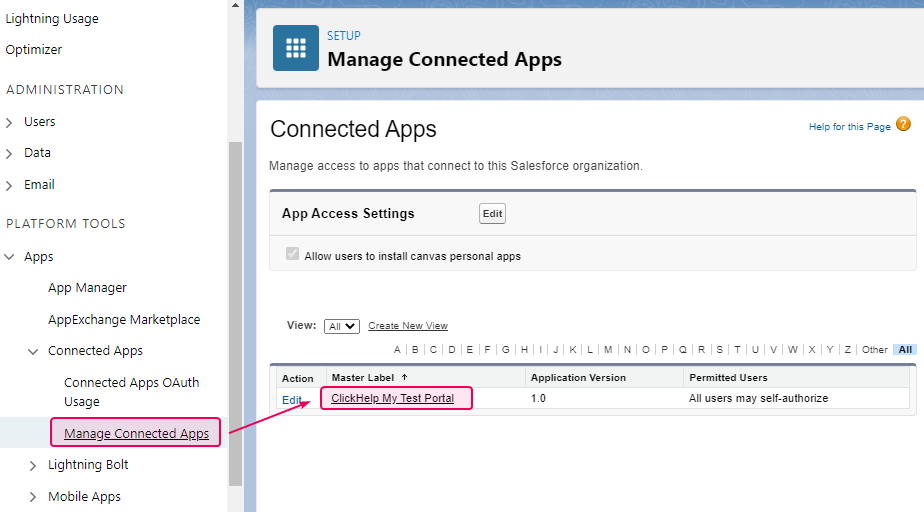
- For this, go to the Manage Connected Apps screen in Salesforce and click the application you've just registered.
-
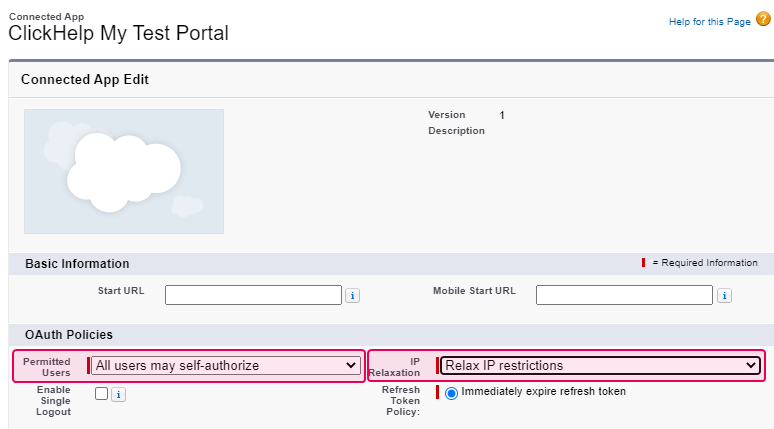
Click Edit Policies, set the All users may self-authorize value for the Permitted Users field, and the Relax IP restrictions for the IP Relaxation field.
Now you can log in to your ClickHelp portal using your Salesforce credentials — the corresponding option will appear on the Login screen.