Use a Custom Identity Provider
You can authenticate your ClickHelp portal users (contributors and power readers) through your authentication service that implements OpenID Connect.
Implementing an Identity Provider
Let's suppose you have a web application that requires users to log in. You would like to automatically authenticate your users in the documentation portal when they login to your application. To make this happen, you need to implement an OpenID Connect Identity Provider in your web application. There are plenty of ready implementations in a dozen of programming languages here: http://openid.net/developers/libraries/.
With the use of those examples, you can add OpenID Connect support into your web application. Once you specify your Identity Provider parameters in your ClickHelp portal (as described below), users will be able to authenticate both in your application and documentation portal in one go.
Adding an SSO Connection to Your ClickHelp Portal
To allow SSO authentication in your documentation portal, you need to add a new SSO Connection in Tools → Portal Settings → Administration → Single Sign-on. Once you navigate to that screen, click the Create OpenID Connect Connection button:

Upon clicking the button, you will see a new provider appearing underneath it. Also, the list of parameters to specify will become active on the right side of the page. Typically, your IT department or your web application developers will be able to provide you with all those parameters:
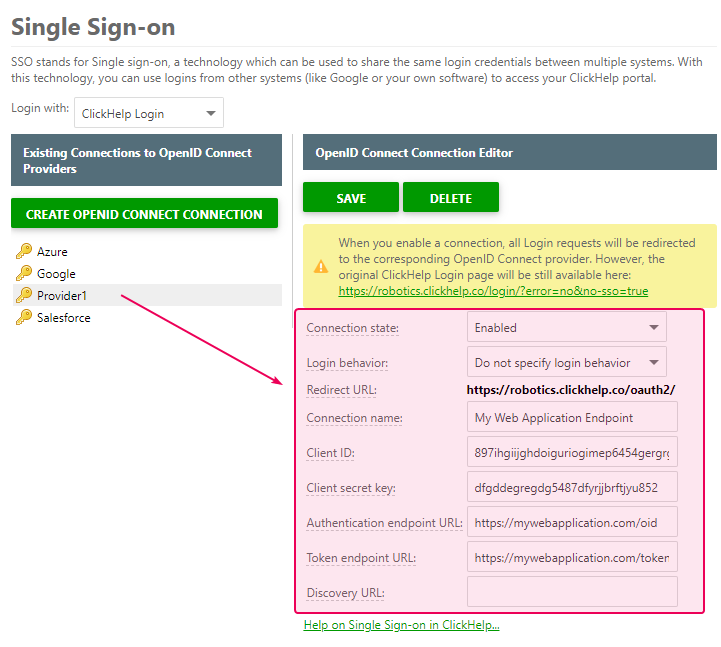
Then, click Save, and that's it! Now you can select the added connection in the Login with the field at the top of the page.