Custom Domain Name for Your Portal
In ClickHelp, you can change your default Domain Name to a custom name of your choice.
The default name of any ClickHelp portal looks something like this: mycompany.clickhelp.co. It is possible to assign a custom domain name to your portal. Typically, you may want the documentation portal to be a subdomain of your main company domain: docs.my-company-website.com. This will require making a change in the DNS records of your company domain so that the new domain points to your ClickHelp portal. To do this, you may need some help from your IT department. Here is an example of how it looks in one of the popular domain name registrars Namecheap:
Furthermore, you will need a corresponding SSL certificate for the appropriate domain name if you want to use your own certificate.
Applying a custom domain name to a portal does not cause downtime. However, after doing so, you will have to log in to the portal again. |
Assign a Custom Domain Name
Before you start setting up a custom domain name in ClickHelp, ask your IT department to change the DNS records through your domain registrar's interface. The idea of the change is simple - you link your default portal name with your own custom domain name by creating a special CNAME record.
| The DNS records may take several hours to be applied on your domain registrar's side. The older records can be cached in your network making the update time even longer - you can reboot your Internet proxy or router device to make it update its DNS records. |
To change the Domain Name:
- Go to Settings.
-
Click Administration → Domain Management in the left-hand navigation panel. This will open the Domain Management settings page where you can configure your custom domain name.
-
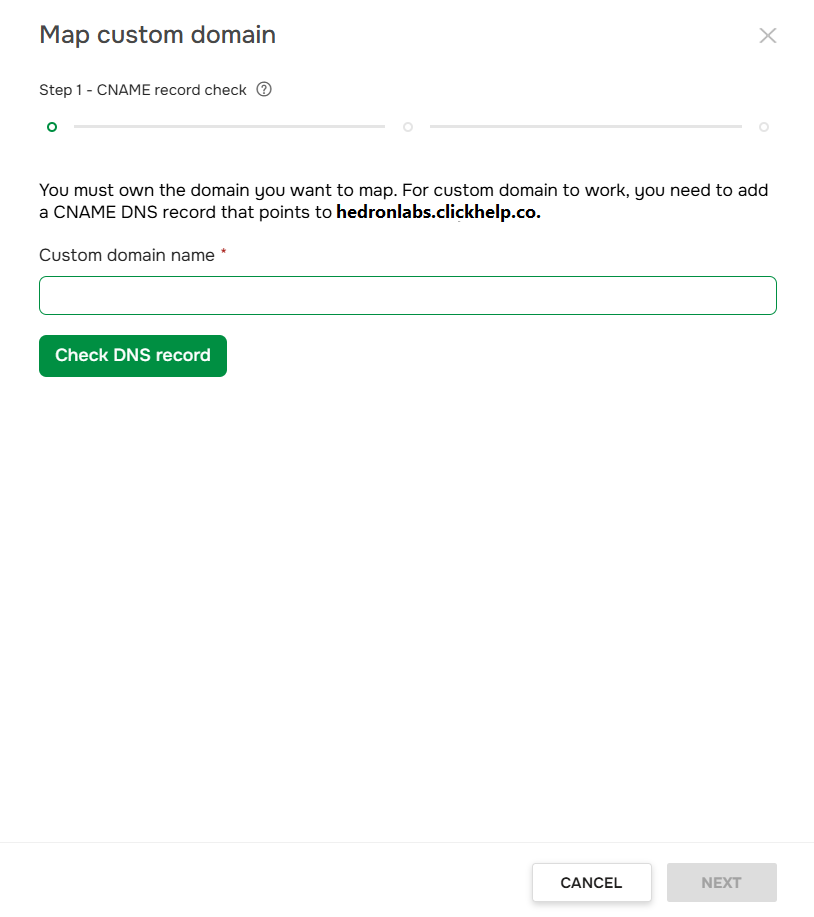
Click Map custom domain button and the Map custom domain wizard will open.

- Type the new Domain Name in the box at step 1 of the Wizard and click Check DNS record. After that, the check for the correct DNS record will begin. It may take some time.
- Click Next after the check is complete.
-
Select the type of SSL certificate at step 2:
-
Let's Encrypt. It is a free basic certificate. If you select this option, the certificate will be issued automatically, so you won't need to do it manually. It will also be automatically updated.
- Custom. It is a purchased certificate with manual update. Upload the certificate in the PFX format and specify the PFX file password in the corresponding box. If the password is not required, leave the password box empty. Please refer here for more detailed information: Certificate Types.
-
Let's Encrypt. It is a free basic certificate. If you select this option, the certificate will be issued automatically, so you won't need to do it manually. It will also be automatically updated.
-
Click Next.
-
The next step of the Wizard shows the result of the setup. If you have selected the Let's Encrypt certificate, the process of getting the certificate will start. Once the Let's Encrypt certificate is applied, we will send you an email.
-
Click Finish.
After the certificate has been applied, your Online Documentation Portal will become available by the new custom Domain Name. This way, you will get a unique Domain Name that can match your main website name and increase your recognition on the web.