ClickHelp User Manual
Reusing Style Files
Every project has a list of style files, and those style files are independent files in your ClickHelp Styles Storage. This means that you can reuse them across different projects.
So, here are the steps demonstrating how to reuse style files across different projects:
-
Open File Manager.
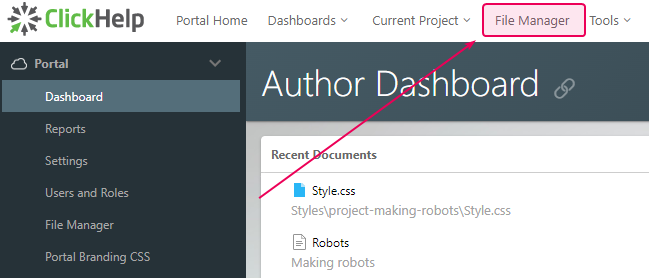
- Go to the Styles tab.
-
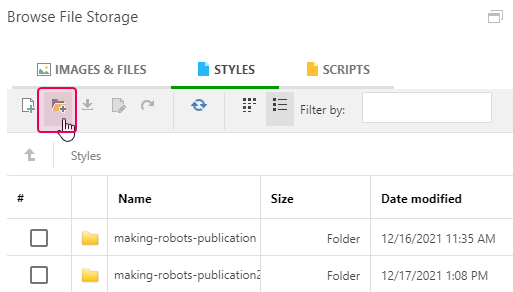
Click the Create New Folder button on the File Manager toolbar or press F7 on your keyboard and call the new folder shared-global-styles.
-
In one of the project folders, find the file you want to use as a global style file. Click on it and select Move from the toolbar or press F6 on your keyboard.
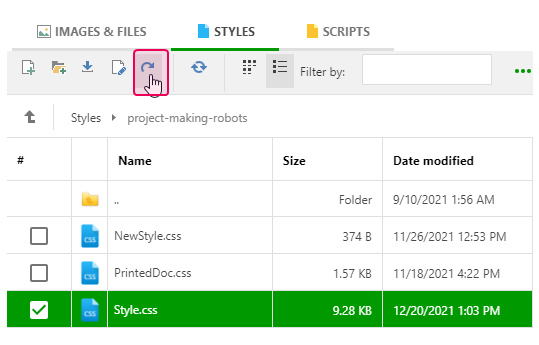
- Select the newly created folder in the pop-up window as the destination folder and press OK.
-
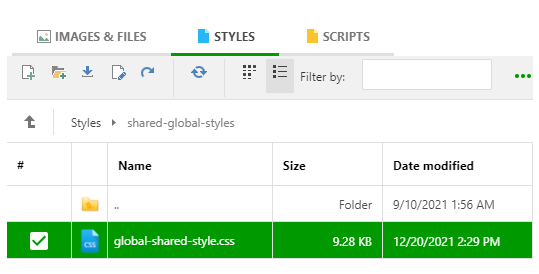
Just to make it clearer that this file is going to be used as a global style file, rename it (by clicking the button on the toolbar in File Manager or pressing F2 on your keyboard) to global-portal-style.css.
- Now for every project that you want to use this file in, go to Project Setting → Basic Settings.
-
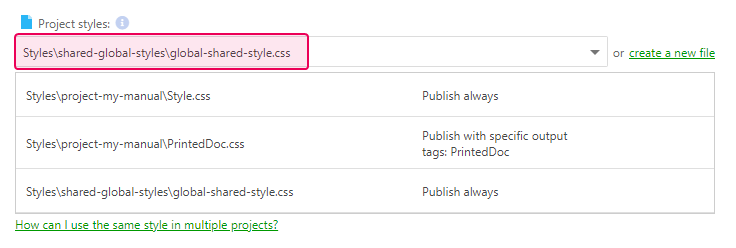
In the Project Styles section, click on the input field and enter “global-portal-style” to search for your new global styles file.
-
Add it to your project by clicking on it. It will be added to the bottom of the list, thus having the highest priority. You would want to move PrintedDoc.css lower than the new file, for PrintedDoc.css styles to be applied to your printed documentation.
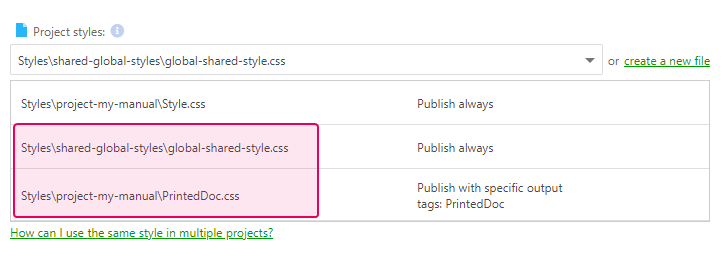
- If you plan to use the same styles for all of your projects, remove the default Style.css from this list to keep your styles clean and avoid possible issues.
- If you need to override one of the style properties for a specific project, you can create a new .css file and add it to that project’s Style Files to the bottom of the list. Every property this new file will have (like h1, body, etc.) will override your global styles for this specific project.