Topic Content Styling
The style of the topic content is controlled by inline styles and the CSS styles defined in the project settings. Let's learn how to use each approach and what the differences are:
- Inline Styles
- CSS Style Files
- Start With a Default CSS Template
- Quick Way to Open Your Project CSS
- Conditional CSS Styles
Inline Styles
When using the Design mode, you can change the style of the text blocks and other elements directly in the topic, e.g., make some text bold, underlined, italic, change font name, and size. You can also specify the image style (i.e., image position, margins, border style, and color) when inserting an image by using the Insert → Image command of the ribbon bar.
If you know HTML a little, you can even switch to the Source tab of the editor and add the style attribute to some elements to specify paddings, margins, and other styling attributes.
Inline styling is easy and fast, so you can utilize many styling functions on the Home tab of the editor ribbon bar. The drawback of this approach is that document maintenance may become tricky as it grows. Let's suppose you had all screenshots left-aligned, but now you want them to become center-aligned. Another case is when you used blue as the text color of all headings, and now your company changes their web design, and all headings must become red. With inline styling, you would need to make such changes in every topic.
So, if you can get some basic CSS expertise, consider using CSS styling for easier documentation maintenance and a more standardized appearance of the document elements.
CSS Style Files
A CSS file is a text file with styling rules defined in some special format. To learn more about this format, you can easily find training materials on the CSS language on the Internet.
In ClickHelp, each project can have several CSS files associated with it. We recommend that you start with one CSS file for simplicity.
To learn where to find the full list of the CSS files and how to open them check out the following article.
If the list is empty, this means that you don't have any CSS files in your project, and the topics are using the inline styles only. To create a new CSS file and add it to the project, click the create a new file link to the right of the file selection dropdown box.
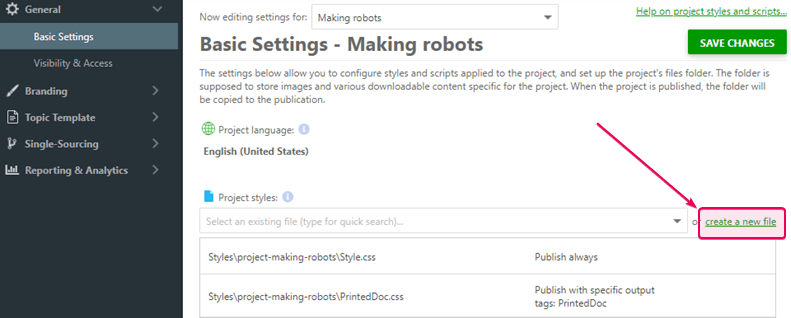
Upon clicking the link, a new CSS file will be created in the Styles storage, added to the project styles list, and opened for editing in a new browser window.
If you already have a CSS file in the Styles storage, you can add it to the project by selecting the file from the dropdown list.
|
|
Important |
| The lower the styles file is in the list, the higher priority it has. Thus, if you have the same rule in different files, the browser will apply the rule from the lowest file in the list. | |
Start With a Default CSS Template
Creating a CSS file from scratch may look complicated. We recommend that you start playing with CSS by creating a new project using an existing template.
ClickHelp project templates are created based on modern design trends specially for user manuals. The templates include customized ready-to-use elements like tables, information and warning boxes, etc. All the templates can be used as is.
If you still want to change the design of a template, once you create a project from a template, you can open its settings to see the list of CSS files used there. Click Open for Editing... for the default Style.css file to view its contents so you see the CSS rules for the main topic elements: links, paragraphs, headings, lists, etc. Use this default CSS file content to create your own style for your project. Just change the style attributes for the existing rules to vary colors, font size, etc.
Quick Way to Open Your Project CSS
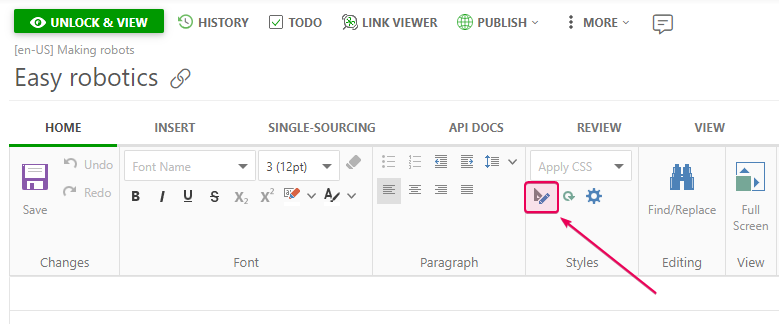
When you are in the Design mode and need to modify the project CSS file, you can click the Edit Style button in the Styles section on the Home tab of the ribbon bar. This button will open the very first CSS file from the Project Styles list.
Conditional CSS Styles
ClickHelp is a single-sourcing tool for documentation authoring. This means that it supports a number of techniques to vary the final output, so you can generate different documents from the same project. One of the advantages of this approach is conditional styling: you can have different CSS files for different output types, e.g., online vs printed.
When you are in the General > Basic Settings category of your project settings, hover over a CSS file in the Project Styles list and click the Publishing Properties... button that appears on the hover (the rightmost icon). You will see a dialog allowing you to specify the publishing mode of this CSS file.

By default, the publishing mode is set to Publish Always - such CSS file will be applied to the final output in any case.
You can use Publish with specific tags and Do not publish with specific tags modes to make the style conditional. You will need to specify the list of Output Tags for each of those options. You can select Output Tags in the publishing wizard when publishing the project. Depending on that tag selection and the publishing settings of the project styles, ClickHelp will include or exclude the style files when creating a new publication.