2. Create Help Topics
In this tutorial chapter, you will see how to create and manage help topics in ClickHelp.
In ClickHelp, a topic is a single structural part of a project. It's a small document — sometimes called an article or a page in other systems — organized in a tree-like navigation structure. Each topic has a title and content. To learn more about topic-based authoring, read Topic-Based Authoring.
In the previous chapter of this tutorial, we created a new project. It has a few default topics, but let's see how you can create your own!
Create a New Topic
First, open the newly created project. You can do so from the Projects page — locate the project and click its title.
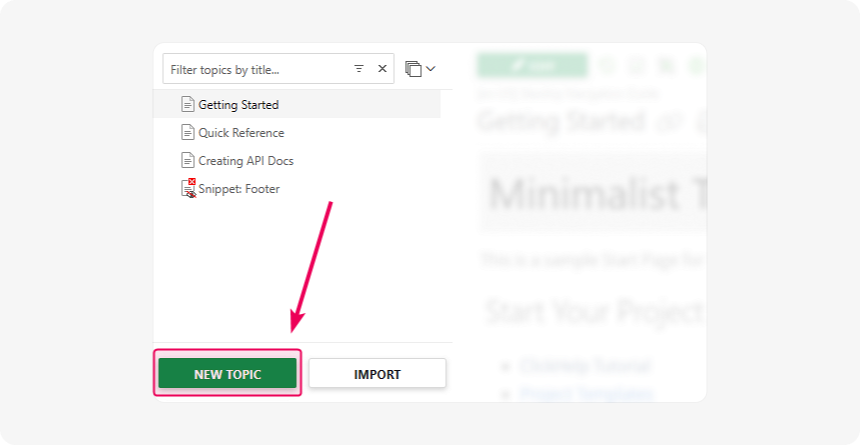
Once it opens, you'll get to the Topic Editor page, which has two main areas. The Table Of Contents (TOC) on the left shows your project's hierarchy of topics, and the content area to the right displays the currently opened topic's content. The TOC tree already has four topics on the root level. These sample topics demonstrate some basic things you can achieve with ClickHelp. For example, the Snippet: Footer showcases the single-sourcing functionality and is used as the footer for the current project with the help of the Master Page.
Let's create a new topic by clicking the New Topic button.
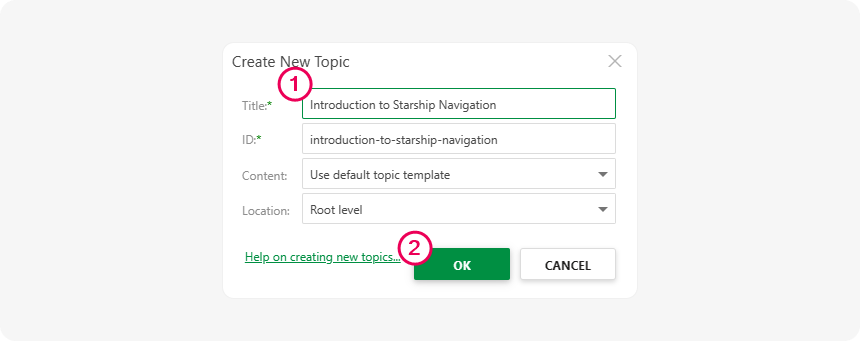
You will see a dialog just like the one in the screenshot below. Specify Introduction to Starship Navigation as the topic's title and click OK:
To learn more about topic creation, you can read Create a Topic later.
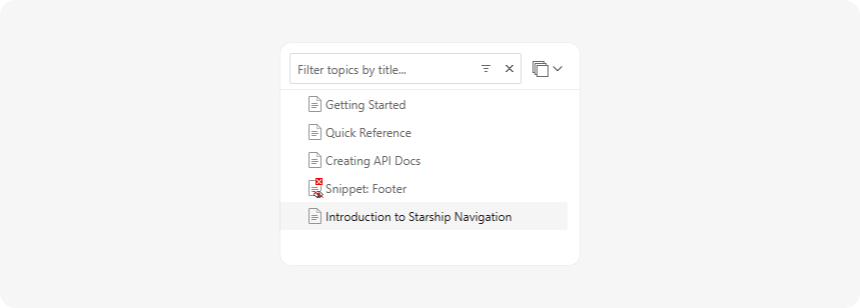
Now, you can see the newly created topic in the TOC.
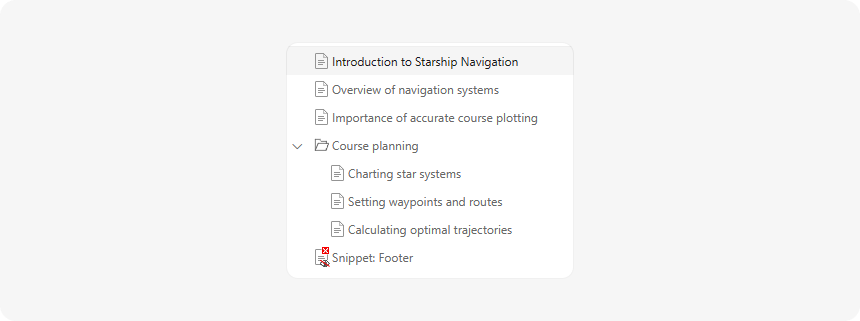
Let's add a few more topics on the root level by repeating the steps above and call them Overview of navigation systems, Importance of accurate course plotting, and Course planning.
Now, add a few child topics for the Course planning topic. Hover the mouse pointer over a node in the TOC, click More (⋮), and select New Child Topic. You will see a familiar dialog where you must specify the topic title and click OK.

Repeat the process a few times until you've created three child topics: Charting star systems, Setting waypoints and routes, and Calculating optimal trajectories.
Here's what you should end up with:

Good job!
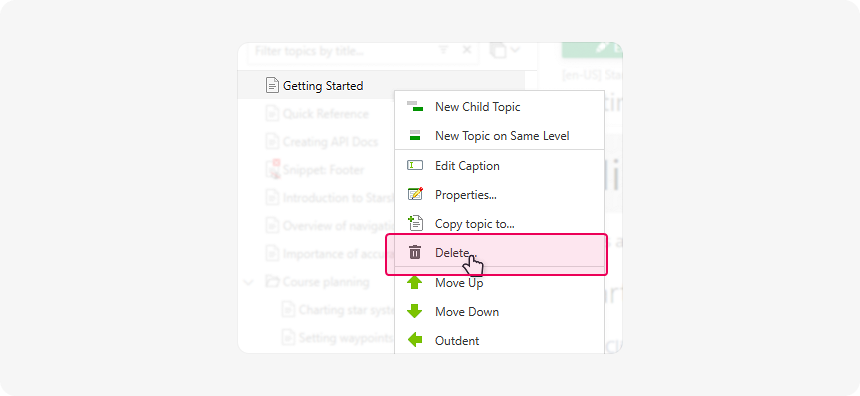
Delete Topics
Since the default topics are only examples, let's get rid of them. Click the More (⋮) button when hovering over a topic in the TOC or right-click the node, and select Delete from the context menu for each of the default topics, except the Snippet: Footer.
Rearrange Topics in the TOC
Hover the mouse pointer over a node in the TOC. You will see two green arrows pointing up and down — these allow you to rearrange the topic's positions in the Table of Contents. Alternatively, you can click the More (⋮) button to see even more controls — besides the Move Up and Move Down you've just seen, you can to Indent and Outdent topics. Here is a helpful article on arranging nodes in the TOC: Arrange Topics in Table of Contents.
| Alternatively, you can drag & drop the nodes by clicking and holding a node for even faster rearrangement. |
Try rearranging the TOC structure so it looks like this:
Fantastic, you'll be creating topic hierarchies like a pro in no time! Your project is now ready for us to add and edit content. Let's proceed to the next lesson: