Arrange Topics in Table of Contents
The Table of Contents is one of the most popular navigation means in online documentation, even though some technical writers consider it old-fashioned. Typically, the topics are organized in a tree-like structure. Topic grouping may be different - by functional areas, by the audience, by UI screens, etc.
In ClickHelp, the Contents tree is a useful tool for both contributors and readers. It helps contributors quickly filter the topics of interest (for example, those assigned to them ). For readers, it is a simple navigation mechanism suitable for the majority of usage scenarios, especially for mid-size manuals (dozens of topics).
TOC Node Types
Topic nodes without children. This is the most common node type - when you click it, you can see the corresponding topic in the reading pane (to the right).
Folders. This is a grouping element to organize topics into logical groups in the contents tree. Folders do not have topics associated with them - when you click a folder node, no navigation happens and the reading pane does not update.
Topic nodes with children. This type of contents elements is a combination of the first two types. Such elements are used as the grouping elements that can have child nodes, but they also have topics associated with them. When you click such node, navigation happens and a corresponding topic is loaded to the reading pane.
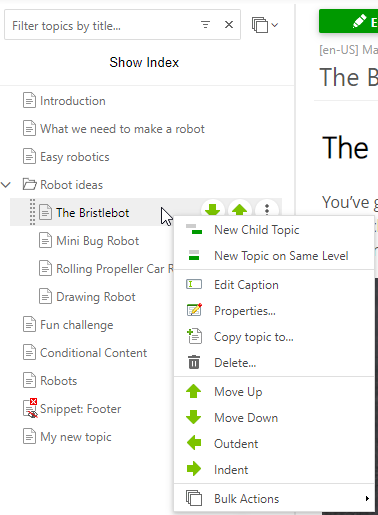
To create nodes of different types, use either the Contents panel toolbar or the panel's context menu. You can right-click any node in the contents tree to create a new child node or a new node on the same level. Use the arrow buttons on the toolbar to move the nodes in the tree.
TOC Node Properties
Every node of the Contents tree has a number of properties. To edit those properties, right-click the node and select Properties...
In the Properties Editor , you can select custom icons for nodes, change the title mode, set up settings affecting the printed output, etc.
Moving TOC Nodes
There are several ways to move your nodes in the TOC.
-
Use the
context menu
to move the nodes.
Right-click
a node and choose the needed action. You can
move
the node
up
and
down, or
indent
and
outdent
it.
-
To simply
move
your nodes
up
and
down
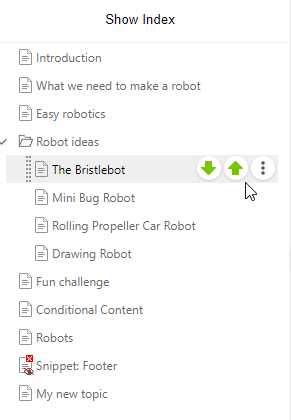
(no indenting/outdenting can be done this way), hover your mouse pointer over a node and click the corresponding green arrow. Note that sometimes the arrows can be hidden due to a very narrow Contents panel, resize the panel using the splitter to see the elements.
-
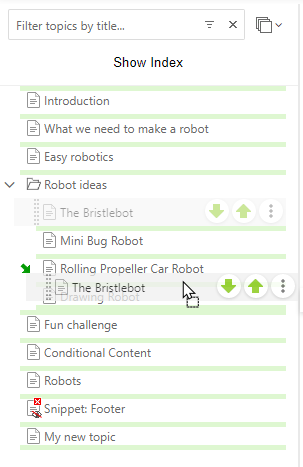
You can also
drag-and-drop your nodes within the Table of Contents. This approach will allow
moving
the nodes
up
and
down as well as
indent
and
outdent
them. To turn a node into a child, the arrow must be centered. When the arrow is in the middle position, the node will be placed between other ones like it's shown in the screenshot below.
TOC Node Modifiers
Depending on certain parameters set in the Topic Properties, a symbol appears on the TOC node icon. There are several, and here's what they mean:
- "Crossed out eye" symbol - The topic is not displayed in the Table of Contents in the publication.

- "Green plus" symbol - The topic is published with specific Output Tags only.

- "Red minus" symbol - The topic is not published with specific Output Tags.

- "Red X" symbol - The topic is never published.
