3. Edit Help Topics
In this chapter, we will go over the basics of content editing in ClickHelp:
Add New Content
First, let's add some content to one of the topics you added in the previous step of this tutorial. Select Course planning in the TOC and click the Edit button at the top of the page. The topic will open in the Design mode.
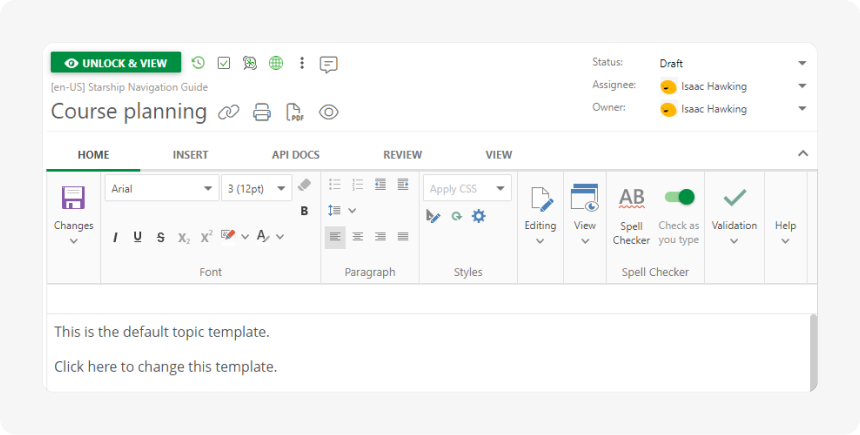
Delete the default content or play around with it; add your own — the Home tab of the editor's ribbon allows performing various basic operations such as changing the font, adding formatting, creating ordered and unordered lists, etc. We trust that most, if not all of them, are already familiar to you from using other tools like MS Word or Google Docs, so we won't stop here and move on to more ClickHelp-specific functionality.
Insert an Image
Let's add an image to our manual. We will be uploading it from our computer. To do this:
- Switch to the Insert tab of the ribbon.
- Click the Image button in the Media section. The Insert Image dialog will open.
-
Upload the desired image to your portal's File Storage by dragging & dropping the file to the Preview area of the dialog or by clicking in the Preview area to select it from your device.
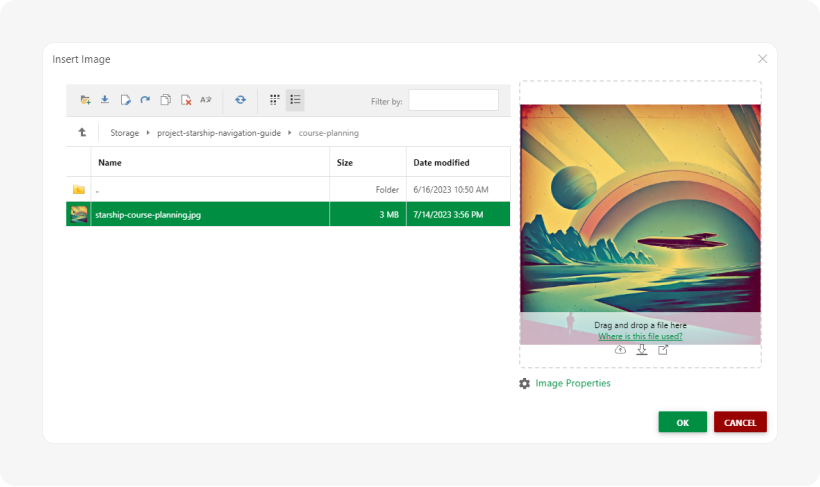
- You will see your image appear as a file in the File Storage on the left with its preview on the right.
- Click OK.
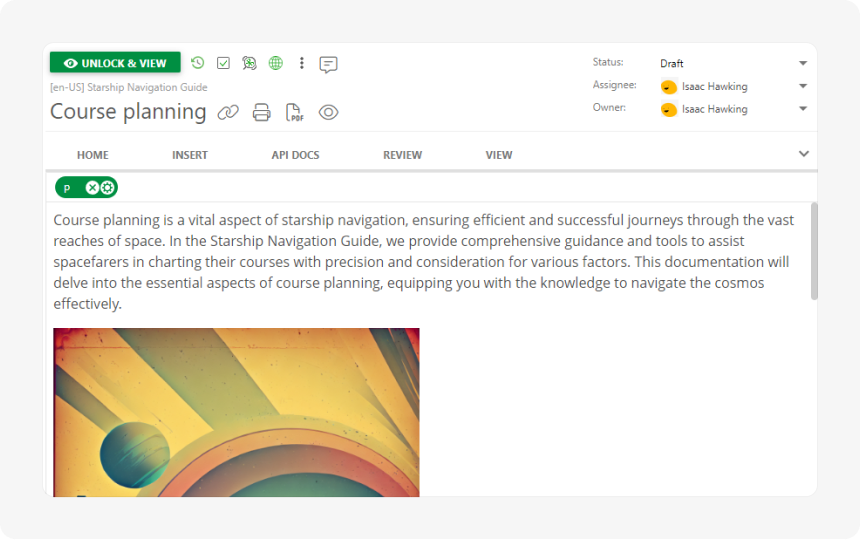
Now, we have an image in our topic. Well done! This is what our topic looks like now:
To learn more about inserting images, refer to the following topic: Insert Images.
Insert a Video
Now, let's add a video.
- Make sure you're still on the Insert tab of the ribbon.
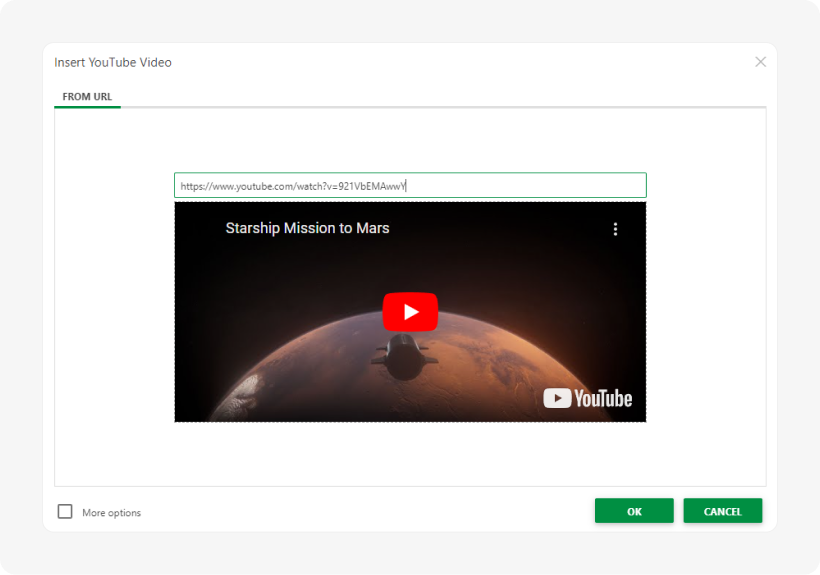
- Click the YouTube button in the Media section. The Insert YouTube Video dialog will appear.
-
Paste the URL of the desired YouTube video to the corresponding field. A preview of the video will appear.
- Click OK.
That was easy, wasn't it? If you wish to learn more about inserting videos, you're welcome to read the Insert Videos topic.
For now, let's explore the editor's possibilities further.
Add a Link to a Topic
Let's see how to insert another basic element into the content — a link. We are going to reference one of our other topics.
To create a link:
- Find a suitable place for your link and place your cursor there.
- Once again, check that you're on the Insert tab of the ribbon.
-
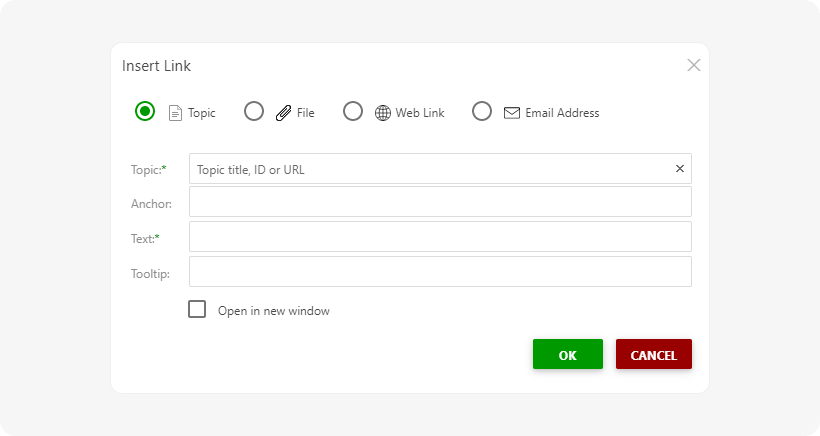
Click the Link button in the Links section. You'll get the Insert Link dialog:
-
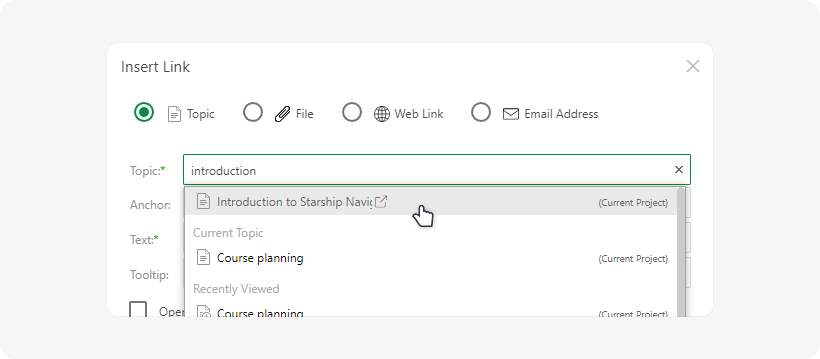
Start typing the desired topic title in the Topic field, and when it appears in the dropdown list, click it — let's insert a link to the Introduction to Starship Navigation topic.
- Click OK.
You have just created a link. Great job! This is what the link looks like in the text:

Add a Web Link
Now, let's reference an external resource — a website.
- Select a portion of the text — a word, for example.
- Verify that you're still on the Insert tab of the ribbon.
- Click the Link button in the Links section.
- This time, select the Web Link at the top of the dialog.
-
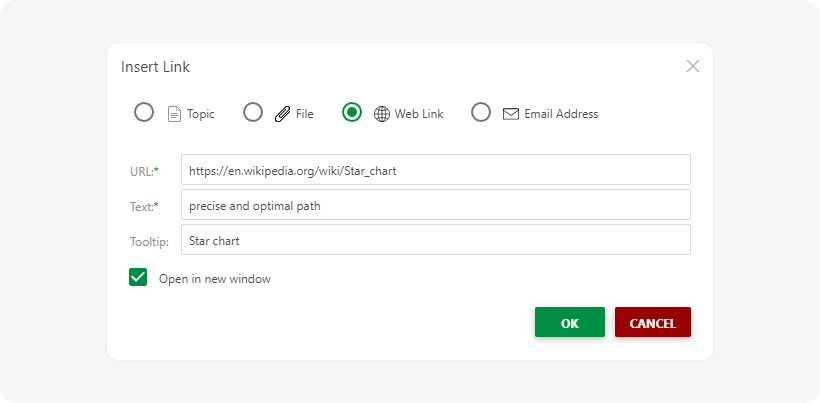
Fill in the URL, Text, and Tooltip with the following values:
- URL — https://en.wikipedia.org/wiki/Star_chart
- Text — precise and optimal path
- Tooltip — Star chart
- Click OK.
Wonderful, now you have a link to a page outside your portal. To learn more about inserting links, refer to the following topic: Insert Links.
Insert a Warning Box
Congratulations, you've made it this far! We bet your topic looks spectacular at this point. Why don't we spice it up a little more and add a Warning Box?
- Once again, we'll use the Insert tab.
- In the Quick Parts section, click Insert and select the Warning Box.
-
Replace the default text with something that makes more sense inside a warning box.

Congrats on creating the Warning Box! You'll be able to modify how it looks going forward.
This step also marks the completion of step 3 of our tutorial, which was particularly rich with events and actions, and it's great to see you've come this far. Let's proceed and see how to reuse the created content!