Create a Web Help Manual
In the ClickHelp documentation tool, you can create different kinds of outputs for your documentation using the single-sourcing techniques. Also, you can choose your output format that will cover your needs. Among other formats, ClickHelp supports the Web Help output.
|
|
Note |
| WebHelp exported from ClickHelp has a WCAG 2.0 AA-compliant reader interface. The content compliance depends on the user styling and is not controlled by ClickHelp. Learn more on Accessibility. | |
What is Web Help?
Web Help is a file-based format - it comes in a form of a set of HTML files, accompanied by images, CSS, and script files. Those are static files that have no connection with the documentation tool where they were created. This is a great way to view the browser-based documentation offline, as well as host it on your own web server. One of the most popular use cases for Web Help is hosting it inside isolated networks that don't have Internet access.
Web Help documentation contains a Table of Contents and Search for easier content navigation, and may have other functions as well.
Typically, it can be opened in any web browser - either as a file stored on disk or as a web resource hosted on a local web server.
Exporting Publications to Web Help
To create a Web Help manual in ClickHelp, do the following:
- Once you have published a project, choose your Publication and start the Export Wizard (for example, you can do this from the Projects page of your ClickHelp portal).
-
Choose
HTML5 Web Help
from the list of suggested export formats.
-
Follow the wizard steps. The last one will provide you with
a download link.
- Click the link to download the archive to your PC. This will be a zip archive with all the required files inside.
The archive content will look something like this:
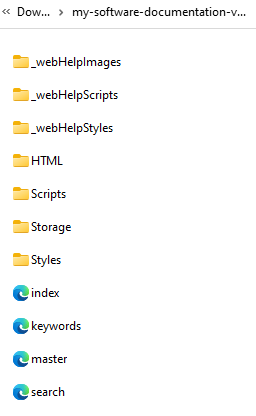
Now, your exported Web Help documentation can be shipped with your product and opened in a web browser offline, or you can host it on your own server.
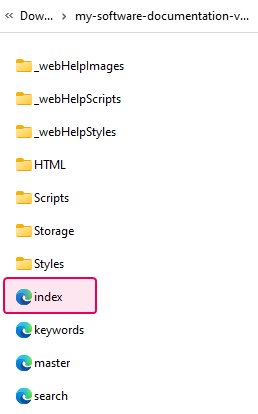
The easiest way to open the Web Help in a browser offline is to double-click the index.html file in the root folder of the archive.
You can also reach any topic directly by opening its HTLM located in the HTML folder of your Web Help archive.
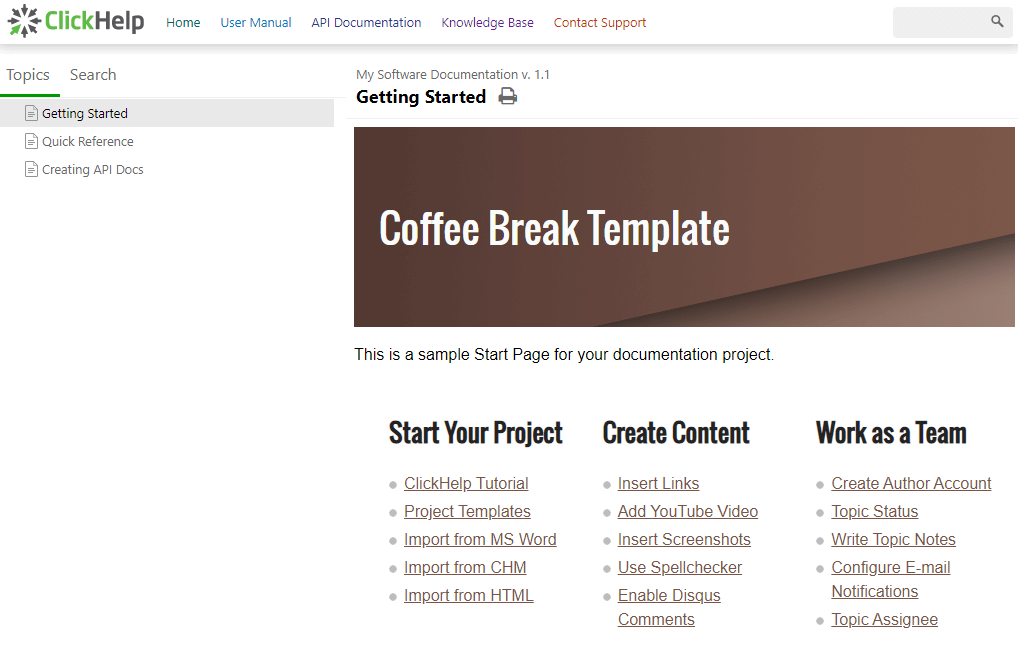
This is an example of how your Web Help documentation will look when opened in a browser:
|
|
Note |
|
WebHelp output does not inherit the Reader UI Template selected in the portal or project settings and uses a special template instead. It also uses a simplified search functionality, and unlike online publications, it does not support search operators. | |
Creating Links in Web Help
Each help topic of your Web Help documentation has a unique URL. This makes it easy to create links for topics. A default link address looks like this:
.../topic-name.html
The Web Help documentation also supports anchor links (links to certain topic sections). The anchor links look like this:
.../topic-name.html#anchor
Branding in Web Help
Since Web Help is a set of static files that are not directly connected to your portal in any way, you can change any of these files to your liking.
For example, if you want to add a global header/footer to your Web Help, you can do it by editing the HTML files located in the HTML folder, but you will need to do it for each of them. When you generate a new Web Help, it will not have your custom changes and you will need to apply them again.
|
|
Important |
| As a part of the Branding Services, we can customize the master file (master.html found in the archive) used for creating Web Help pages for your portal so that you don't need to apply your template to each of the files manually. Contact us at support@clickhelp.com for that. | |
You can also style your Web Help interface via the Branding.css file, which is used to design online portal interface elements.
To isolate styles applied to Web Help from styles applied to the portal, add the .WebHelp_body CSS class to your CSS rules. For example, if you want the main menu header color to be blue for the portal and red for Web Help, you can do it like this:
CSS |
.BaseMaster_mainMenuContainer |
|
|
Note |
| Changes applied by the Branding CSS are isolated from the topic content and don't affect it in any way. If you want to style your topics' content, use project style files instead. | |