Insert Images
While creating online documentation in ClickHelp, you may want to add various images to the topic content: icons, screenshots, GIF animations, schemes, etc.
- Insert Image from your Computer
- Insert Image from ClickHelp File Storage
- Change the Inserted Image
- Disable Autoresizing
Inserting images is done in the topic editing mode. To enter this mode, click the Lock & Edit button in the top-right corner of the screen. You can insert images both from your computer, and use those images that are already stored in your ClickHelp File Storage.
Insert Image from your Computer
-
On the
Insert
tab of the toolbar find Image
in the
Media
group.
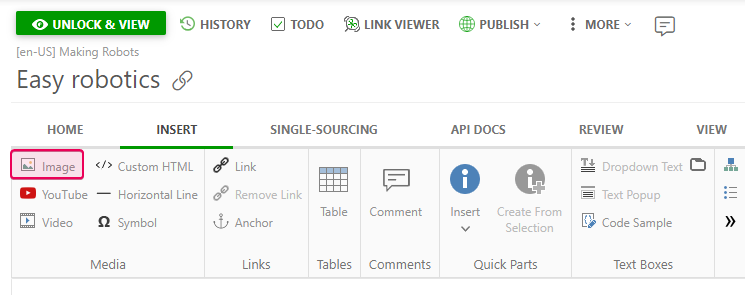
-
Click the
Image
item, and the
Insert Image
dialog will open.
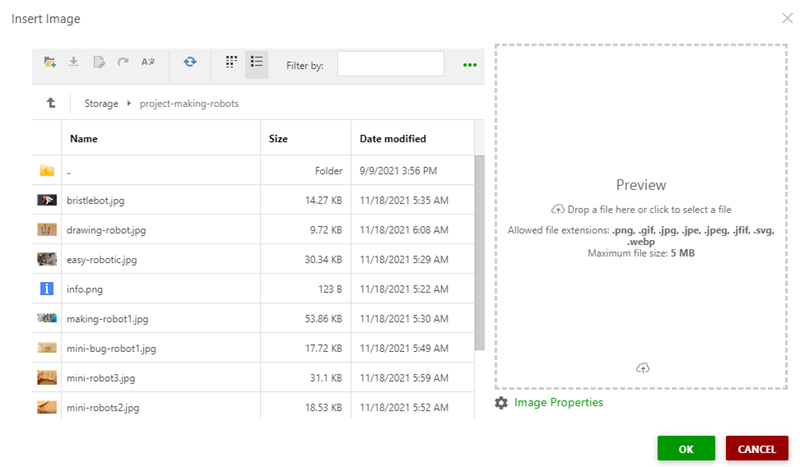
-
Drag & drop
the image from a file manager to the drop zone inside the
Insert Image
dialog.
- Alternatively, you can click the drop zone and select an image file in the Open File system dialog.
- The image file will be uploaded to the folder of the ClickHelp File Storage currently open on the left side of the window. Going forward, you can insert it to other places from the File Storage to keep using the same file for easier maintenance.
-
To specify additional parameters for the image, click the Image Properties link at the bottom.

-
On the
Common Setting
tab, you can change the image's
Size,
Position
and add a
Description.
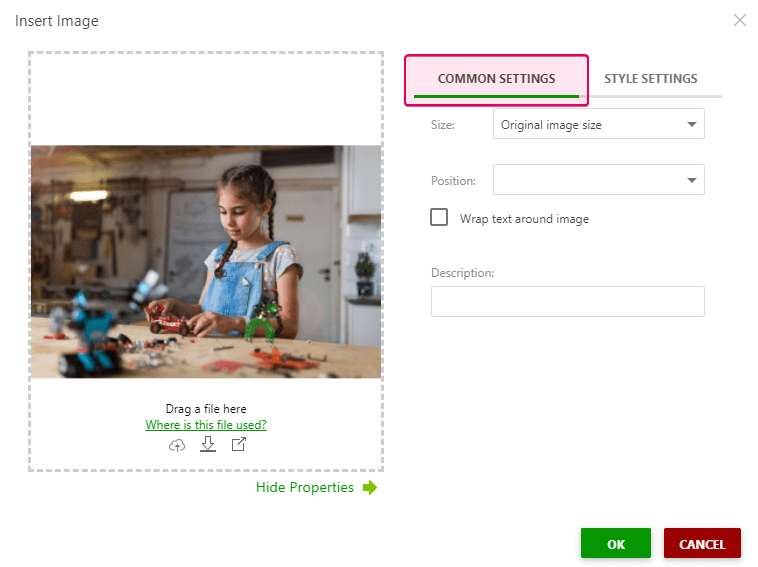

Note For the Wrap text around image setting to take effect, the Position option needs to be selected as well.
-
The
Style Settings
allow you to add
Margins, a
Border
and assign a
CSS class.

- Click Ok.
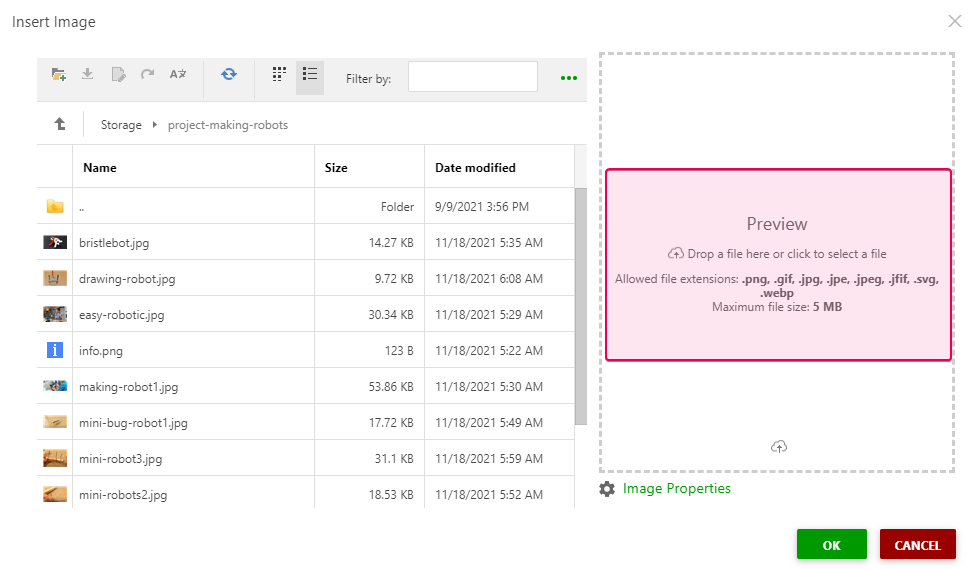
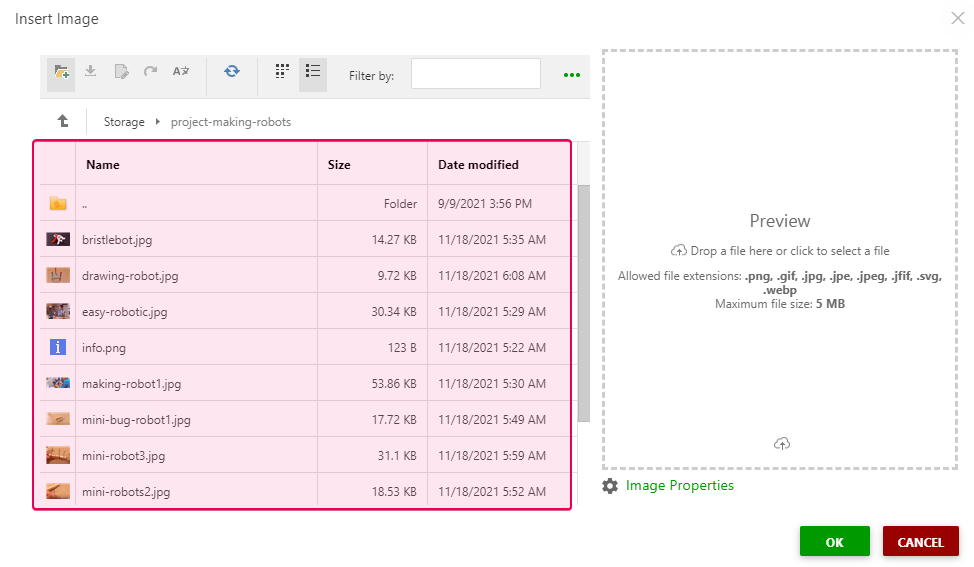
Insert Image from ClickHelp File Storage
- On the Insert tab of the toolbar, click Image in the Media group. The Insert Image dialog will open.
-
On the left side of the window, you will see the files you have in your current project folder in the ClickHelp File Storage.
-
Find the needed image and click it once, its preview will appear on the right side.
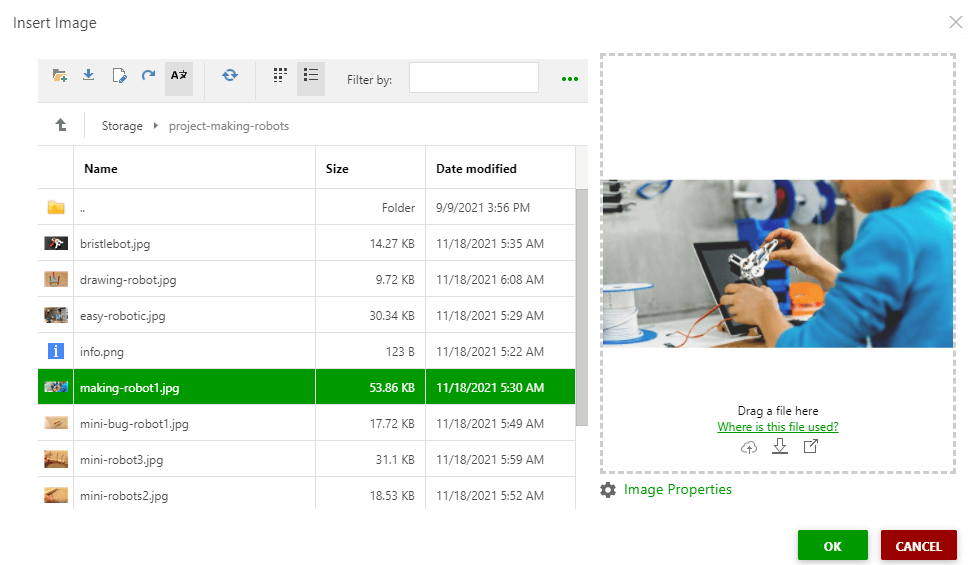
- To specify additional parameters for the image, click the Show options link at the top.
- Click Ok.
Change the Inserted Image
After you have inserted an image to a help topic, you may want to change its parameters — size, borders, the image itself, etc. To do this, double-click the image in the topic contents - the Change Image dialog will open, where you can replace the image with another one, or modify its parameters.
You can open the same properties dialog by clicking the image and selecting the Properties button on the Home toolbar of the Design mode.
Disable Autoresizing
To avoid horizontal scrolling for wide elements like tables, images, videos, iframes, embed elements, etc. ClickHelp features the autoresizing functionality. When a browser window is resized, or a document is opened on devices with a different screen resolution, the enumerated elements change in size, too, automatically.
If you need to disable this feature for an element, add the data-ch-no-autosize="true" attribute to its HTML code.
For example, if your code for an inserted image looks like this:
HTML |
<img src="/resources/Storage/Documentation/Screenshots/Image1.png" alt="Image1"/> |
You should change it into this, and your image won't be resized automatically:
HTML |
<img src="/resources/Storage/Documentation/Screenshots/Image1.png" alt="Image1" data-ch-no-autosize="true"/> |