Advanced Topic Editor
The Advanced Topic Editor offers a well-organized user interface with high usability. There are two modes for working with all your topics: the View mode and the Edit mode. Further, you will get acquainted with the specifics of each mode.
View Mode
The View mode does not allow changing anything in the topic text. The largest part of the page is going to be occupied by your topic's content. As you can see from the screenshot below, the Project or Publication name can be found in the top-left corner of the interface.
In the top-left corner, several buttons are displayed:
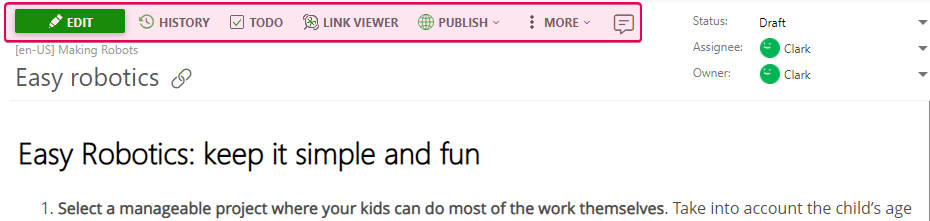
Clicking Edit will switch your User Interface to the Edit mode described in the next section of this topic.
Edit Mode
The Edit mode is where you will spend most of your time creating and editing your documentation's content. To switch to it, click the Edit button in the View mode. This button will change its name to Unlock & View - clicking it now, you'll return to View mode.
| ClickHelp saves your changes automatically every 30 seconds. If there have been no changes since the last automatic saving, no auto-saving is performed. |
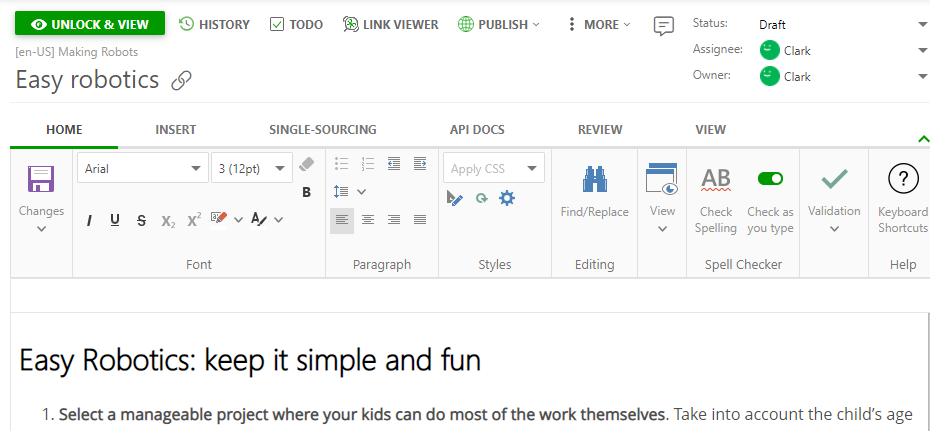
At the bottom of the page, there are three tabs: Design, Source, and Preview. When switching to the Edit mode, the tool takes you to the Design by default. Further on, you can click any of the tabs and proceed to either the Source editor or the Preview tab.
The Source editor allows modifying the HTML code of your topic, while the Preview tab will give you a general idea of what your topic will look like in the output.
To learn more about the User Interface of the topic editor, see the following topics in this section:
- Advanced Topic Editor - Design Mode
- Advanced Topic Editor - HTML Mode
- Advanced Topic Editor - Preview Mode
- Content Pasting Options