ClickHelp User Manual
Create an Export Preset
Export Presets can use either manually defined settings or a Word Template file. Therefore, the process of Export Preset creation is different for these two cases.
Word Template
To create an Export Preset that will use Word Template as a base for its settings:
-
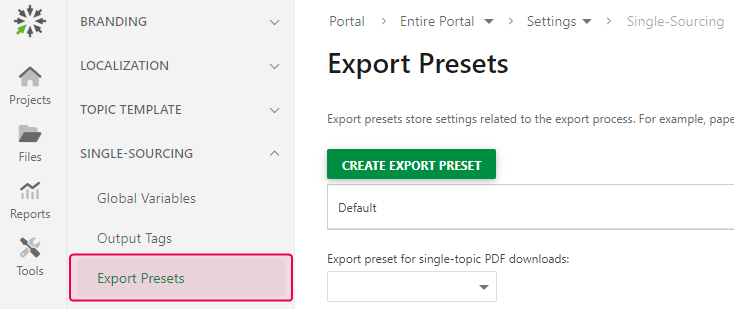
As Export Presets are created on the portal level, open Settings →
Single-Sourcing → Export Presets.

- Click Create Export Preset.
-
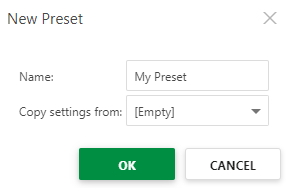
Type the Preset name in the dialog that opens. Additionally, you can also select an existing Export Preset to copy its
settings.

- Click OK.
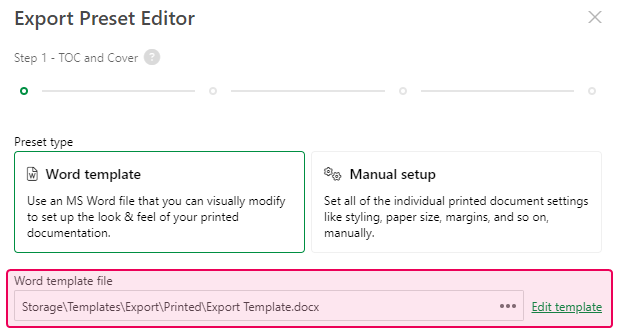
- Select Word template.
-
Specify the file that will be used as a template in the corresponding field. Clicking Edit template will open
the specified file in the Word Template Editor.

- Click Next.
- Go through Step 2 of the Export Preset Editor by setting up the Document Structure and Headings.
- Click Finish.
-
The new Export Preset will appear on the Export Presets page.
Manual Setup
To create an Export Preset with manually specified settings follow the steps:
-
As Export Presets are created on the portal level, navigate Settings →
Single-Sourcing → Export Presets.

- Click Create Export Preset.
-
Type the Preset name in the appeared dialog. You can also choose an existing Export Preset to copy its
settings.

- Click OK.
- Select Manual setup and click Next.
-
Go through Step 2 of the Export Preset Editor by setting up the Document Structure (Max
Heading Level, Cover) and the Table of Contents. You can specify its position (Before
topics, After specific topics, After topics, or None) and choose its font, font size, font
color, etc.
- Click Next.
-
In Step 3, you can configure Headings for your Printed Output.
- Click Next.
-
The last wizard step is dedicated to Page Setup (Margins, Paper Size, Orientation,
Page Numbers, etc.).
- Click Finish.
-
The new Export Preset will appear on the Export Presets page:
